Import MBOX to Gmail: A How-to Guide
Losing Gmail data can be harmful to companies. Unfortunately, Gmail is not entirely secure from data loss. One of the ways to prevent it is to download Gmail data and then upload it back. The present article explains how to import MBOX to Gmail.
Can MBOX be imported to Gmail?
Google Workspace doesn’t have native backup tools to secure your data from loss. Small businesses often download their Google Drive onto a local device. They upload it back in the event of a major occurrence.
Unfortunately, the same procedure cannot be done with Gmail. You can export your MBOX, but importing MBOX into Gmail is not possible natively.
Luckily, you can import MBOX to Gmail using Thunderbird and an add-on. It’s a pretty complex process that requires many steps. We’ll explain it in great detail in the next section.
While the following guide to importing MBOX to Gmail is a useful solution, there’s an easier way to secure your Gmail data from loss. Use a third-party backup solution. It will create daily copies of major Google Workspace services (OneDrive, Gmail, Calendar, and Contacts).
You can recover your entire data or just one entry and leverage multiple historical versions. Tools like SpinOne help you automate the backup process and speed up the recovery.
Export MBOX from Gmail
To export MBOX from Gmail, you need to use the Google account’s data download functionality.
Step 1
Log in to Google using the email you want to export MBOX from.
In the upper right corner, you will find an icon. It will either show your avatar or just the first letter of your email address.
Click on it. A drop-down menu will appear.
Click on Manage Your Google Account.
Step 2
You will be redirected to the page where you can manage your account.
In the left-side menu, click on Data & Privacy.
Step 3
The page where you can manage your data will appear.
Scroll down until you see a box with Download or Delete your data inscription.
There will be two options. Click on Download your data.

Step 4
You will get to the Google Takeout page.
There you can create a new export.
By default, it selects all the Google services and apps that you have.
To not click on all the boxes to untick them, simply click Deselect all above the first checkbox.
Step 5
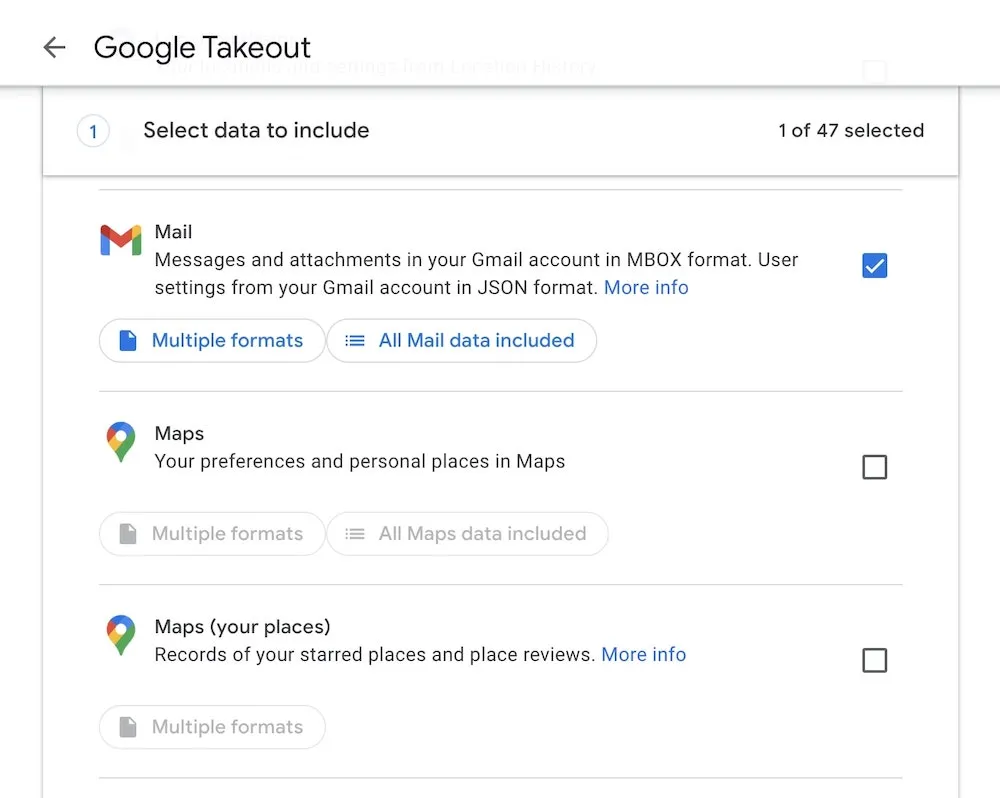
Scroll down to find Mail.
To speed up the process, use an on-page search.
If you want to download only certain types of Gmail data, click on “All mail data included.”
Open the pop-up window. Uncheck the box labeled “Include all messages in Gmail.” Check the boxes you need.
Click OK.
Step 6
Scroll down and click Next step. You will be redirected to the settings of your export.
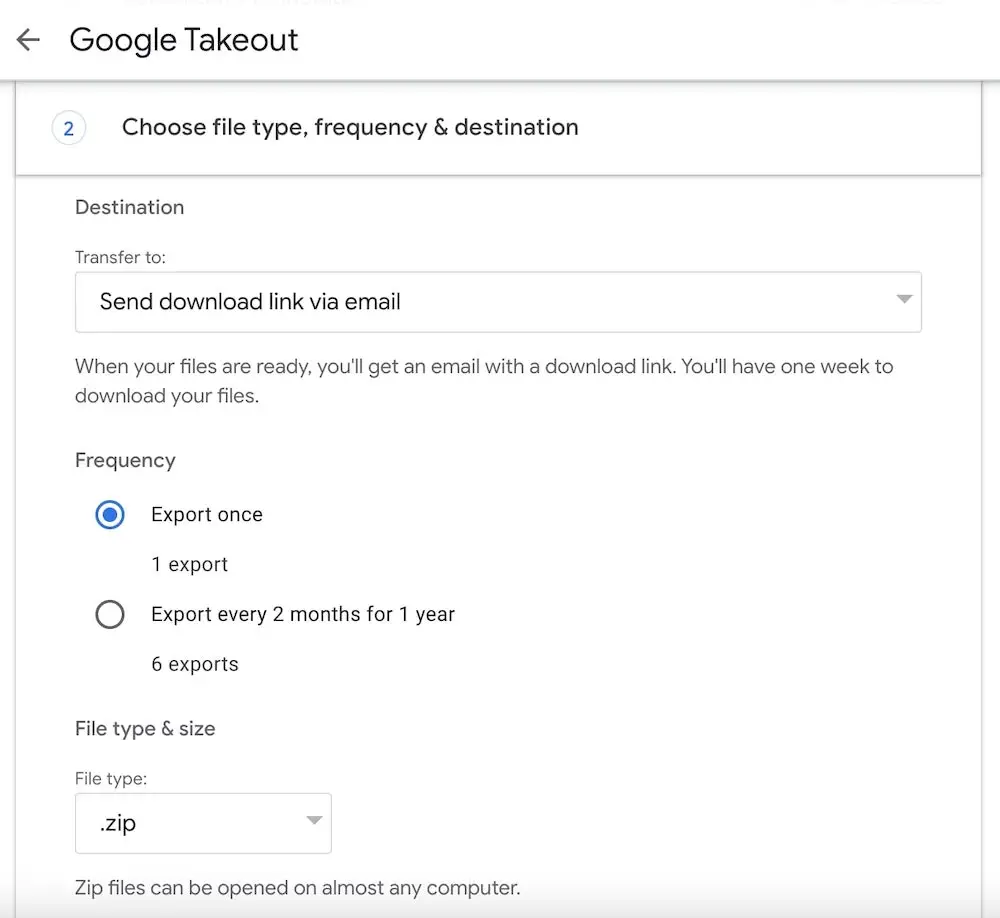
Here you can choose:
- Destination (Add to various cloud drives or send the download link via email)
- Frequency (on-time or once per 2 months)
- File format (zip or tgz)
- And the maximum size of the download file.
Keep in mind that Google can break all your MBOX into several pieces.
Step 7
Click Create Export and wait for an undefined amount of time for the export file to be completed and sent to your email.
Step 8
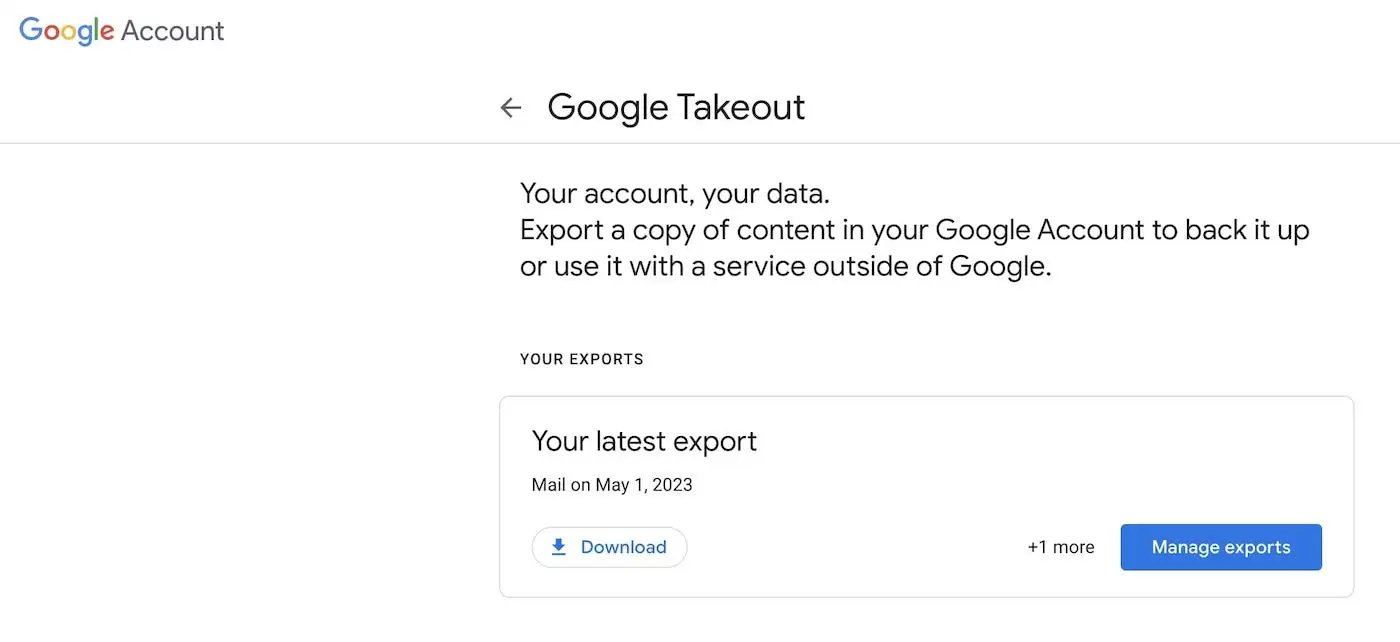
Download your MBOX to your local device from an email or from Google Takeout.
Importing MBOX to Gmail using Mozilla Thunderbird and Add-on
If you don’t have the Mozilla Thunderbird desktop email tool, go to their page and download it. Then proceed with the installation, it’s a pretty easy procedure.
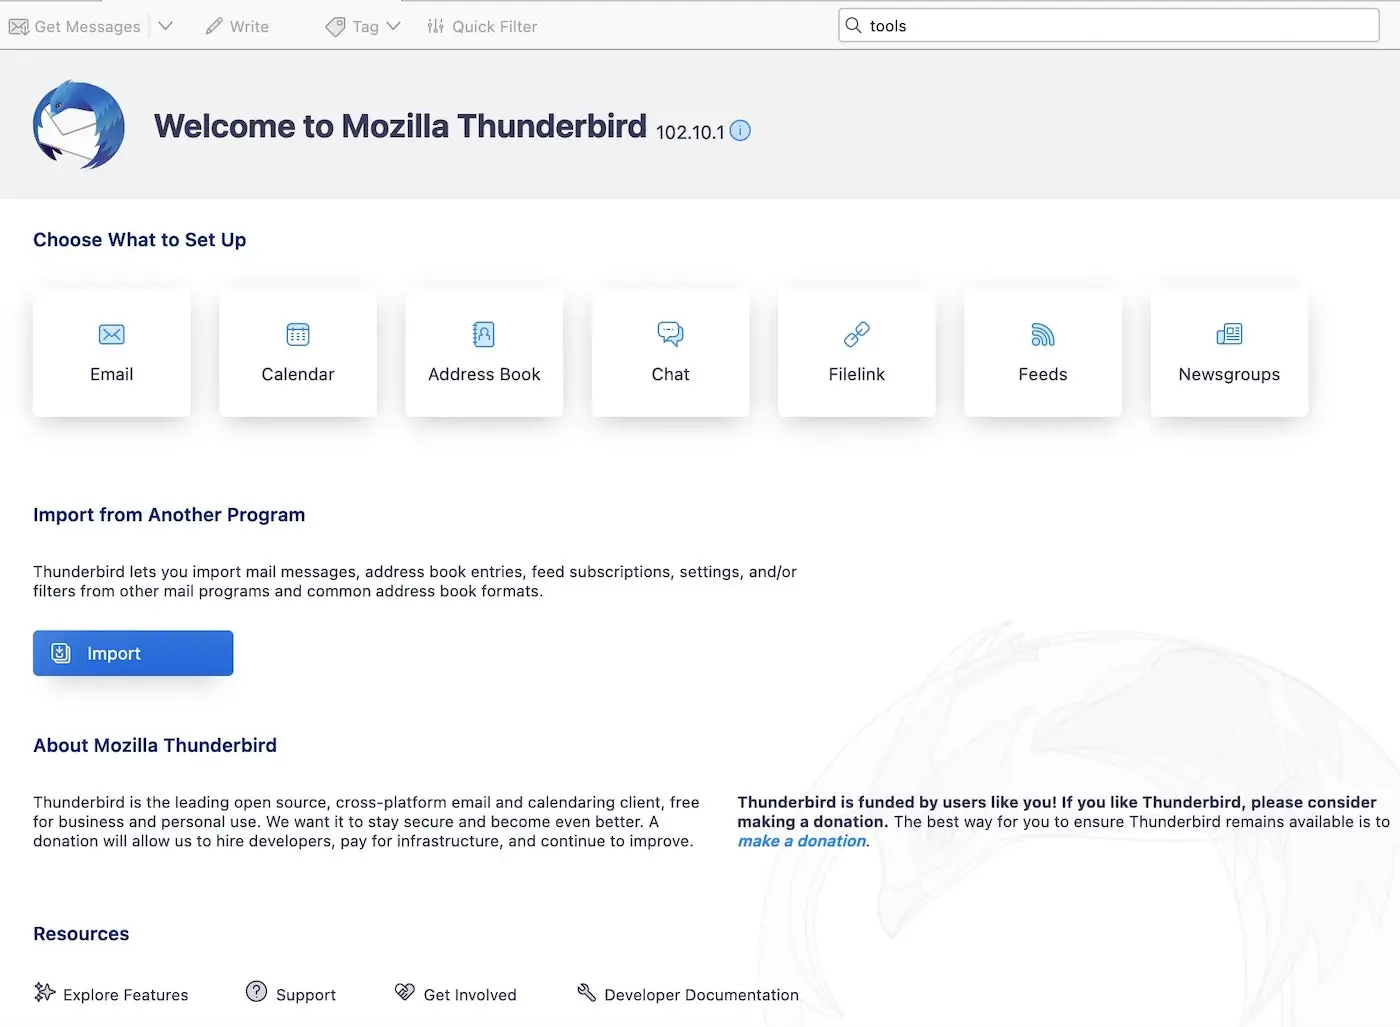
Next, open Mozilla and click Email to add your Gmail to it.
Enter your credentials and proceed with additional security checks if you have multifactor authentication.
How to install an add-on to import MBOX into Gmail
In this section, we discuss how to install an import/export addon for Mozilla.
Step 1
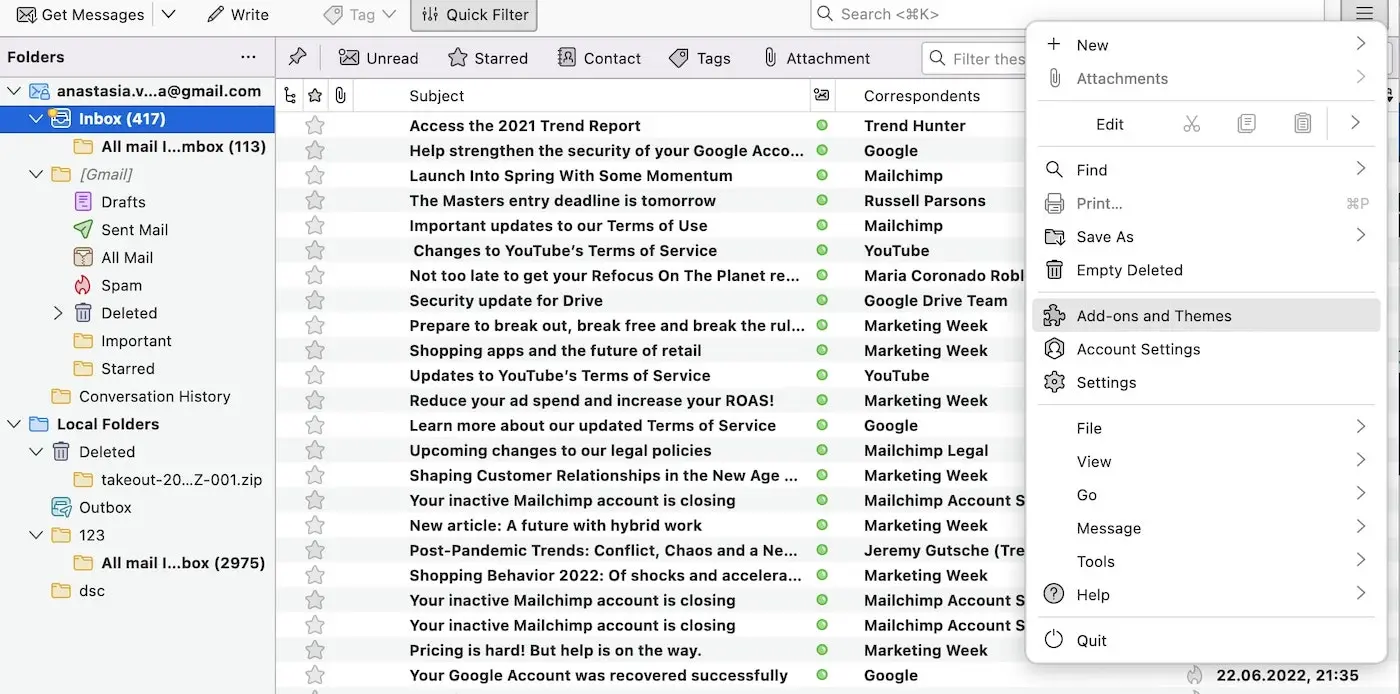
Once your mail is set up, click on the three horizontal lines in the upper corner of the program.
In the drop-down menu, select Add-ons and Themes.
Step 2
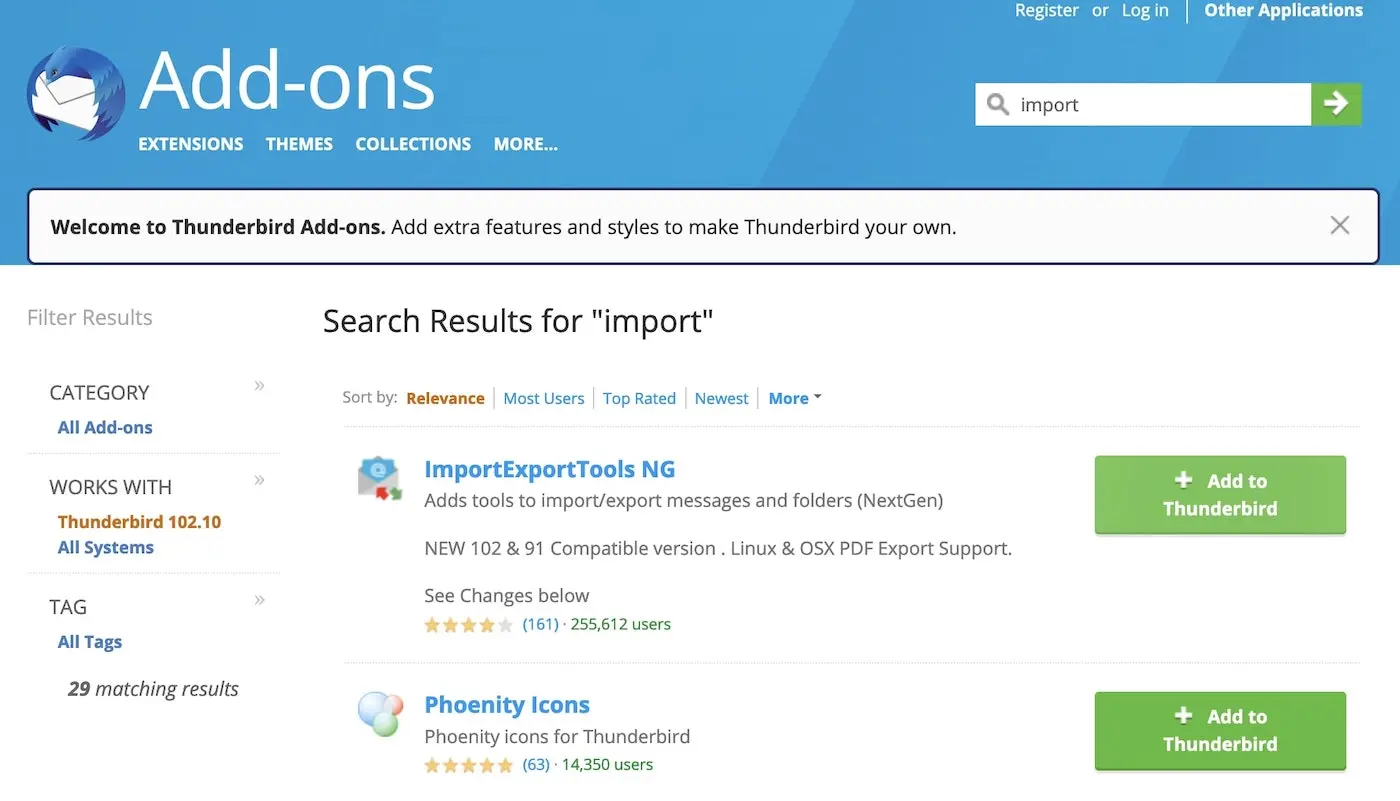
A new tab for Add-ons will open.
It contains a search bar where you should type “Import” and press enter on your keyboard or click on a green arrow.
Step 3
One of the first search results will be ImportExportTools NG.
Click on a large green button next to it (+ Add to Thunderbird).
Confirm your action in the pop-up windows.
Step 4
Once your add-on is added, go to the mail tab. In the left menu Folders, find the section Local Folders.
Right-click on it and choose New Folder in the context menu.
Step 5
Right-click on your new folder and select ImportExportTools NG in the context menu.
One more context menu will appear.
Choose Import MBOX file.
Step 6
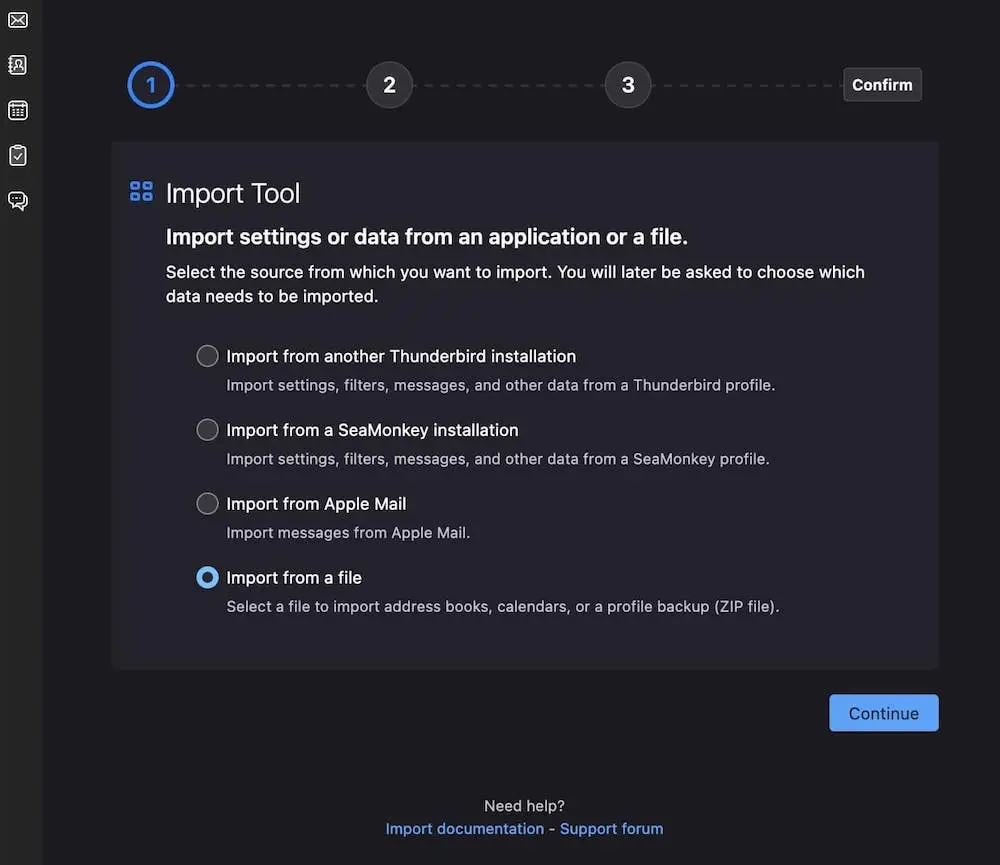
In the pop-up window, choose “Import directly one or more mbox files” and click OK.
In the pop-up window, choose the MBOX file(s) you’ve downloaded from your Gmail.
Keep in mind that you need to unzip it first.
Step 7
Now you have your new folder in the Local Folders. However, it’s still not in your Gmail.
To import your MBOX file on the Gmail server, just drag and drop it from Local Folders to your Inbox.
It will create a new label, and you will be able to see it under a special label.
Unfortunately, your sent and received mail will be mixed up there.
If you need a tool that will return emails to their respective folders, use a third-party backup tool from Gmail. We suggest using Spinbackup, the enterprise-grade backup for Google Workspace services.
Was this helpful?
Latest blog posts
What is SSPM? SaaS Security Posture Management
Article Summary:SaaS Security Posture Management (SSPM) is essential for protecting cloud-based applications from security breaches,...
Everything You Need to Know about Microsoft Exchange Online Backup
Article Summary Microsoft Exchange Online is a critical business tool for email communication, collaboration, and...
Backup and Recovery Methods for Google Workspace
Article Summary Backing up Google Workspace data is essential to protect against data loss due...
