Google Account Recovery: How to Recover Gmail Messages, History, and Data
Google is the undisputed tech behemoth of today’s digital landscape. Millions of dynamic businesses and tech-savvy individuals love and use Google’s products, like Gmail, Drive, Maps, and more because they offer numerous user-friendly features and capabilities.
The downside of these products is that they often contain business-critical data. This wealth of data can be a weakness for businesses, especially those that don’t take regular data backups. Without backups, organizations are vulnerable to catastrophic data losses due to unforeseen circumstances, such as cyberattacks targeting Google products. According to recent reports, these attacks are on the rise, making data backup with a trusted solution like SpinBackup vital to business continuity.
But what if an organization’s Google Workspace is already compromised?
Is Google account recovery possible?
Yes, it is!
This guide to Google account recovery will show you exactly how to restore your Google Accounts and valuable business data. Thanks for reading!
Strategies for Easy Gmail Account Recovery
This section will show you how to recover an email in Gmail in four different scenarios.
Scenario #1. You forgot your password
You changed your Google account password but can’t remember what it is. This can happen to anyone, considering that the average person handles a mind-boggling 168 passwords at a time.
To initiate Gmail message recovery and Gmail history recovery in this scenario, follow these steps:
1. Go to Google’s account recovery page on your computer or phone.
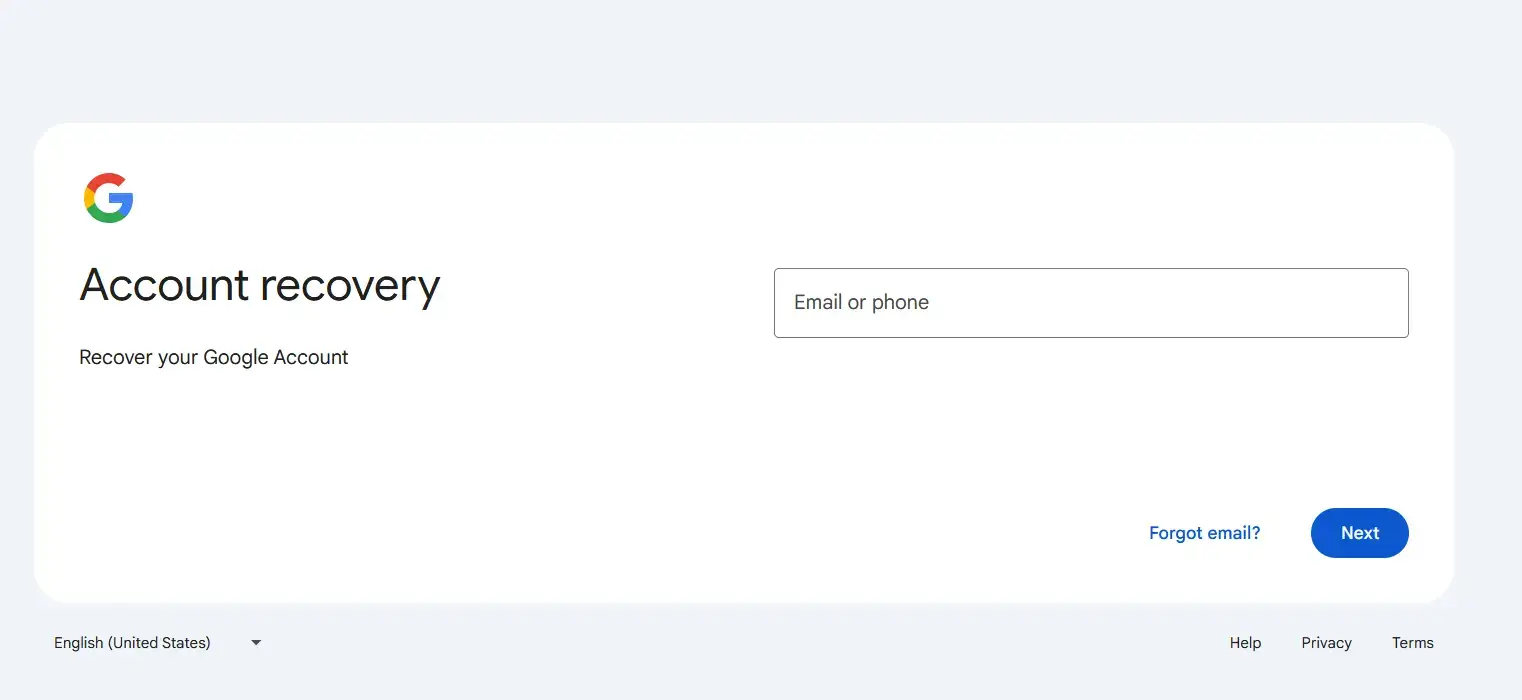
2. Type your email address or phone number.
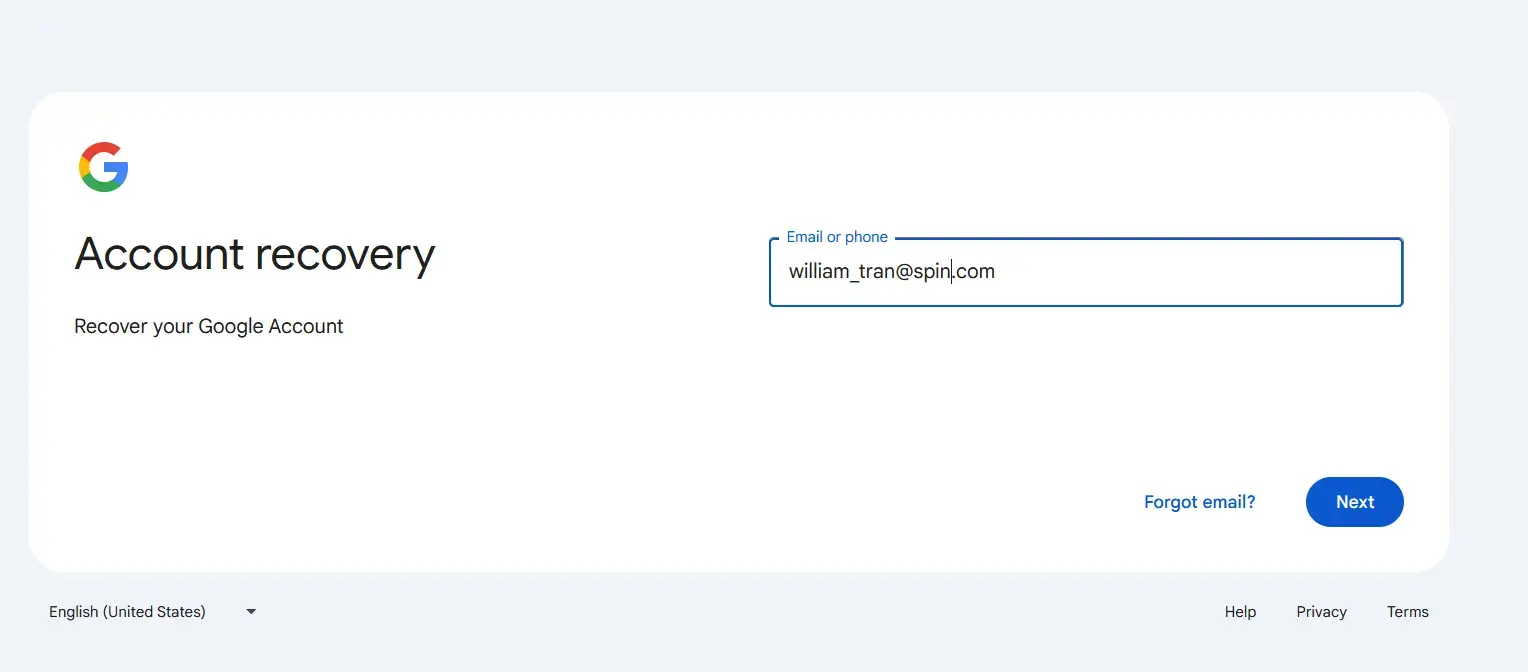
3. Choose your sign in method:
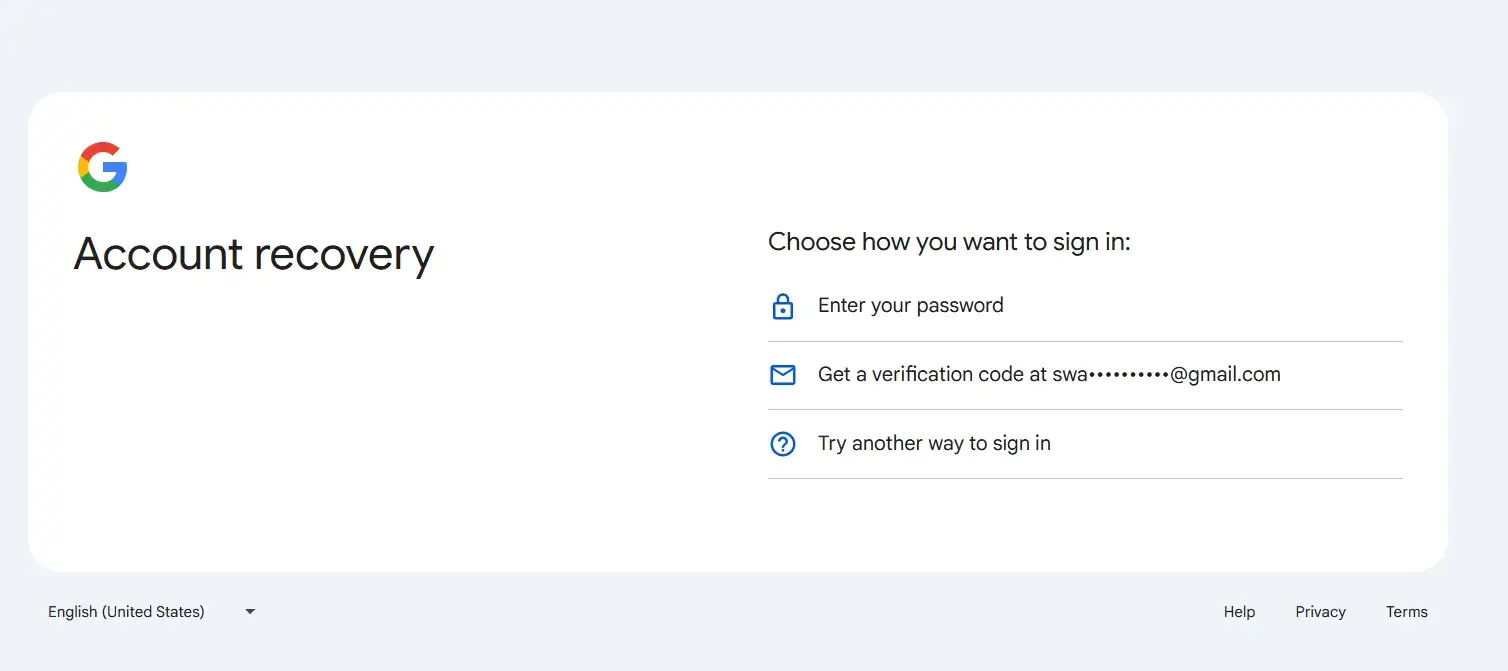
4. If you choose the verification code method, Google will send you the code at the alternative address you provided when the account was created.
- Enter this to verify your identity.
- Gmail will direct you to a page to create a new password.
- Create a password with at least eight characters and a mix of uppercase letters, lowercase letters, numbers, and special characters.
- Confirm the password.
- Select Next.
- Confirm your recovery phone and alternate email address.
- Select Continue to Gmail to access your inbox.
5. If you choose option #3, Google will send a verification code to the phone number you provided when the account was created. Select “Yes, it’s me” to verify your identity.
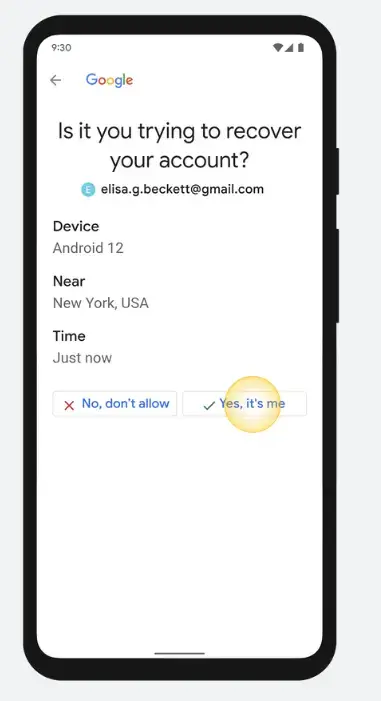
6. You will now be directed to a page to create a new password.
- Confirm the password, select Next.
- Confirm your recovery phone and alternate email address.
- Select Continue to Gmail to access your inbox.
Good to know: To create strong passwords and keep them secure, check out Google’s recommendations here.
Scenario #2. You forgot your email username
Can’t remember if your username is william_tran, william.tran, or w.tran? This is a common scenario for users who maintain multiple email accounts.
In this situation, here’s how to recover an email in Gmail:
- Go to the Gmail sign-in page.
- Enter the alternative phone number or email address you provided during account creation. Click Next
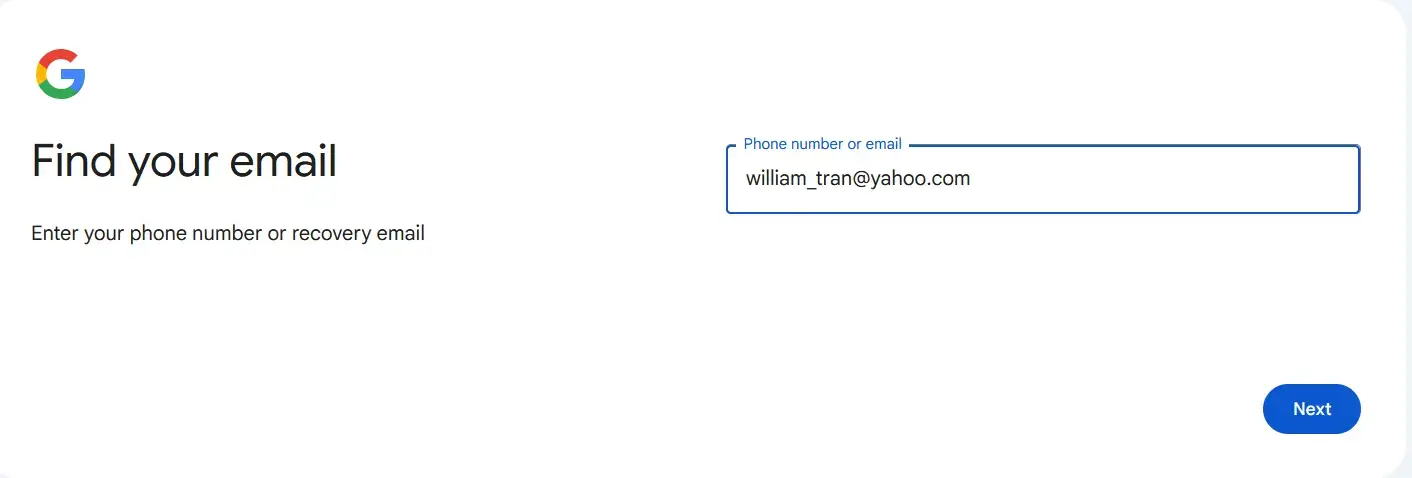
- Enter your first name and last name (optional).

- Click Next.
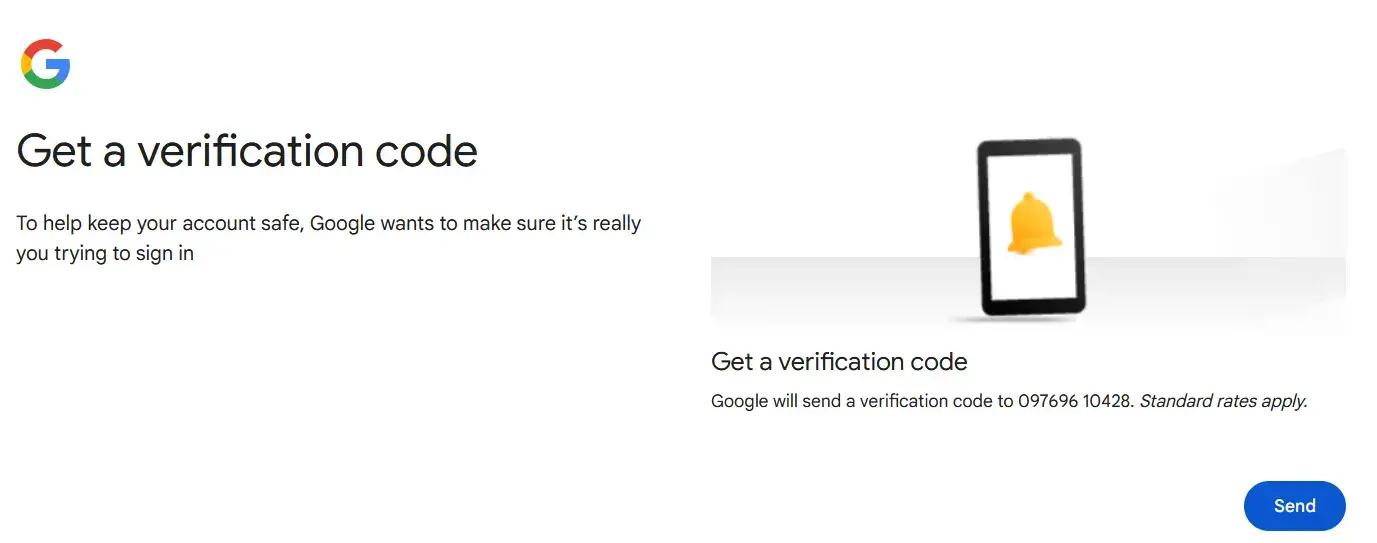
- Click Send to receive a 6-digit verification code from Google to the phone number or email address you provided earlier.
- Enter the code.
- Click Next.
- Select the account you want to sign into.
- Enter your password and select Next to log in.
Scenario #3. Your account has been hacked
Suppose you notice unfamiliar activity on your corporate Google Account, such as account logins outside your regular work hours, unexpected changes to your critical security settings, or unauthorized purchases through Google Pay. These activities may indicate that your account has been hacked.
Fortunately, you can get your account back and make it more secure and hack-proof.
Follow these steps to start your Google account recovery:
- Sign into the account with your username and password.
- Review your account activity by selecting Security on the left navigation panel.
- Select Review security events on the “Recent security events” panel.
- If you believe that someone else is responsible for a suspicious activity, select No, it wasn’t me.
- Follow the steps on-screen to secure your account.
Also check for the devices using your account. Again go to Security on the left navigation panel:
- If you find a device you don’t recognize, select Don’t recognize a device.
- Follow the steps on-screen to secure your account.
- Change the password for all the apps and sites where you use the same password or email address as your Google account.
If you cannot get into your Google account, follow these recovery steps:
- Go to the account recovery page.
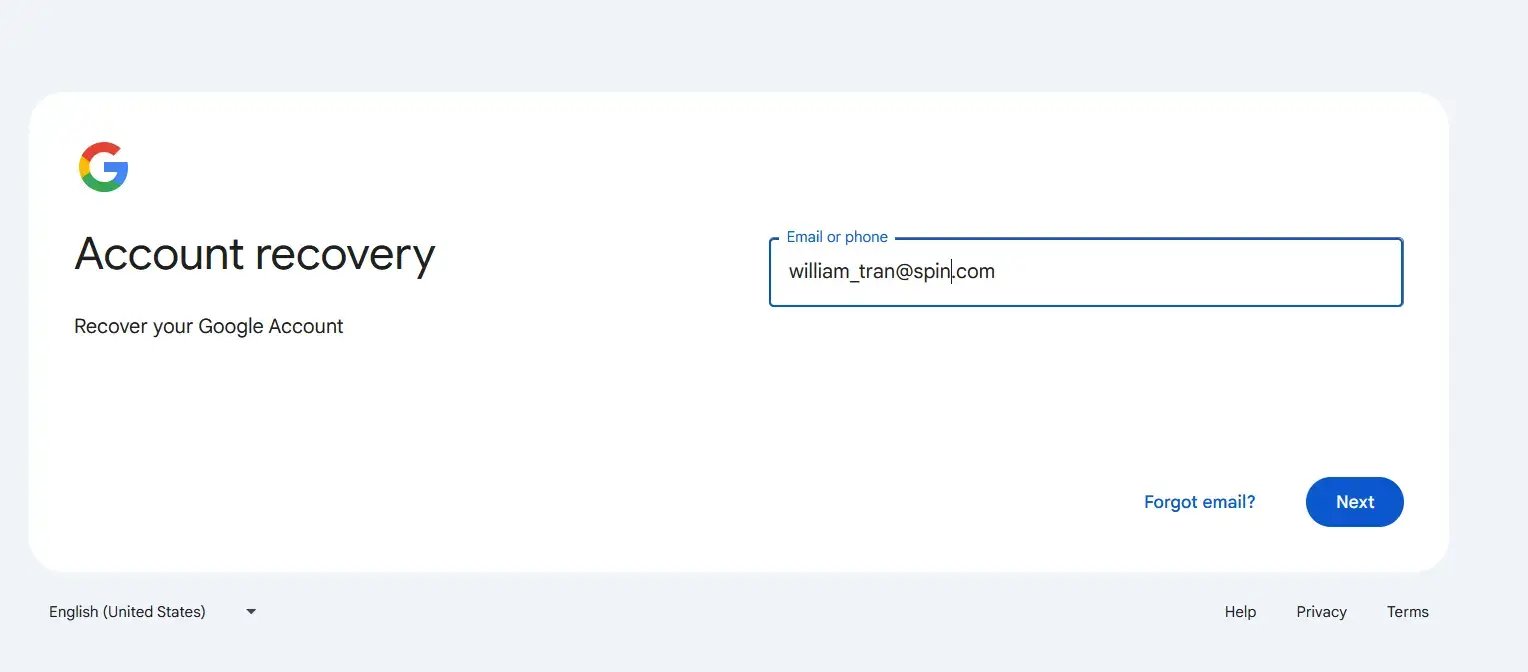
- Answer the on-screen questions as best as you can.
- If you don’t remember your password, use the most recent one that you do remember.
- When prompted by Gmail, enter a recovery or alternate email address that you can access and check immediately if needed.
Account recovery can be easier if you use a familiar device and location, and the same browser that you usually use to access Gmail.
After recovering your Google account, secure it to prevent future hacks by:
- Turning on 2-step verification
- Accessing Gmail and other Google applications from a more secure browser
- Setting up Password Alert on Google Chrome to get notifications every time you (or someone else) enter your password on a non-Google site
- Turning off access for less secure apps
- Removing any labels, filters, or forwarding rules you didn’t set up in Gmail
- Installing and running trusted anti-virus software
Good to know: If you decide to delete your hacked Gmail account to prevent it further compromise, do first check Security Checkup. This feature provides personalized recommendations that can help you to improve account security and minimize further harm. To access Security Checkup, sign into your account, select your profile picture (top right), and select Recommended actions.
Scenario #4. You deleted your account and want it back
You can delete your Google Account for any reason and at any time. But if you do so, you will lose all its data and content, including emails, files, calendars, and photos – unless you’ve already taken a backup using a reliable backup solution like SpinBackup.
You can recover a deleted Google Account by following the steps given in the previous section. After recovering the account, create a strong password that:
- you can remember easily
- is not easy to guess by others
- you haven’t already used with this account.
Good to know: Not all deleted Google Accounts are recoverable. If it’s been awhile since the account was deleted (by you or by someone else), you may not be able to recover its data. You can create a new Google Account to replace the deleted account.
Gmail Message Recovery: Tips and Tactics
Now let’s explore how to recover deleted Gmail messages from the Bin folder as well as permanently deleted Gmail messages.
How to restore deleted messages from the Bin folder in Gmail
In Gmail, deleted messages move to the Bin folder and remain there for 30 days. You can recover these messages within the 30-day period.
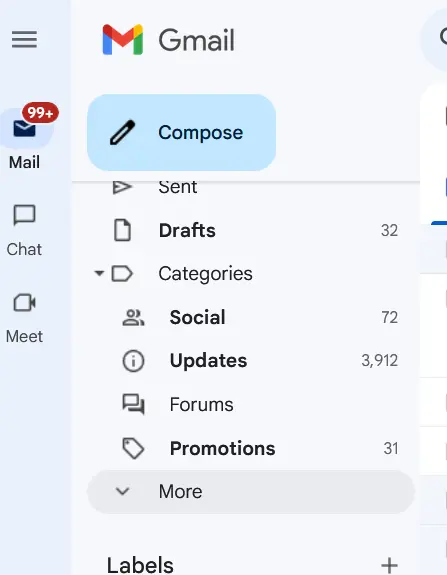
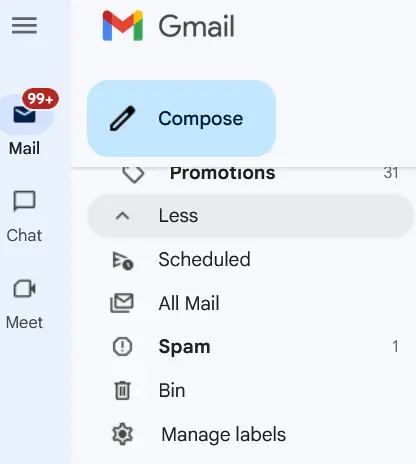
To start, log into your Gmail account and go to Bin. It appears in the left navigation pane under More:
Next:
- Check the box next to the messages you want to restore.
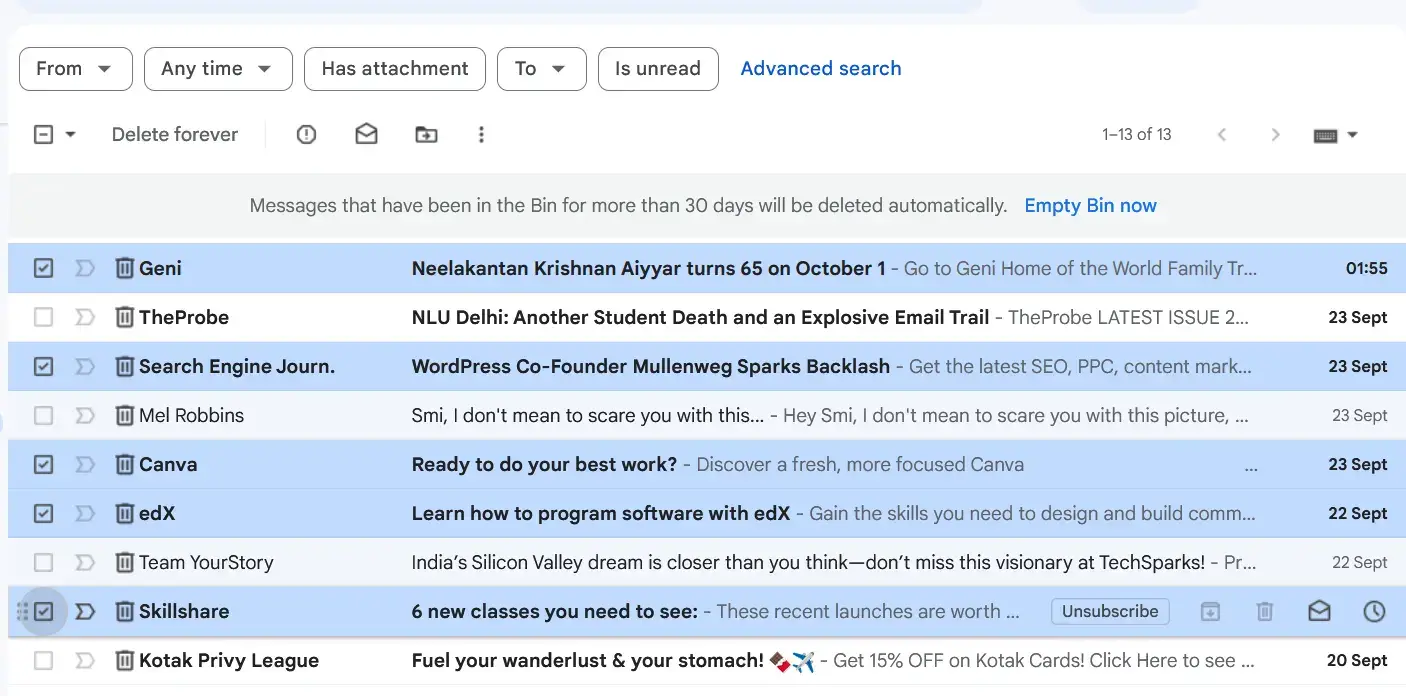
- At the top, click on the Move to button
- From here, select where you want to restore the deleted emails, e.g., the Inbox
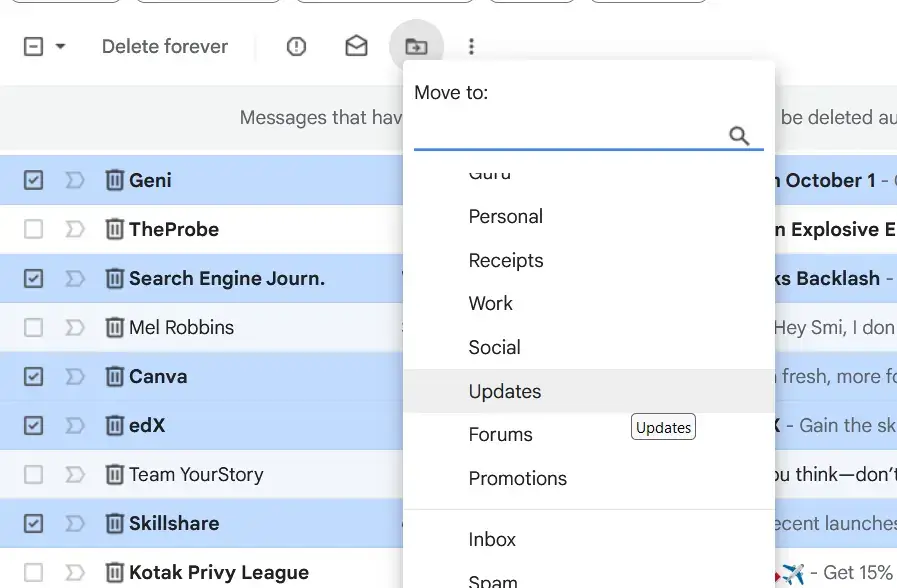
The above process is for recovering messages in Bin by logging into Gmail from a computer.
To recover messages in the Bin from an Android or iOS device:
- Open the Gmail app.
- At the top left, tap Menu
- Tap the sender’s profile image next to the messages you want to restore.
- At the top right, tap More
- Select the folder where you want to restore the deleted emails, such as the Inbox.
How to restore permanently deleted messages in Gmail
For corporate Gmail accounts, only admins are allowed to recover “permanently” deleted messages, i.e. messages that were deleted more than 30 days ago. That said, even admins can only recover these messages up to 55 days from the date of deletion from the Admin Console.
Here’s how to recover deleted messages and facilitate Gmail data recovery from the Admin Console:
- Sign into the Google Admin Console using a valid admin account.
- Go to Menu
- Find the user (whose emails are to be recovered) in the Users list, point to them.
- Click More options > Restore data.
- Select the date range for the data you want to restore.
- Select the type of data you want to restore: Gmail.
- Click Restore.
- Ask the user to confirm if the restored email messages now appear in their Inbox.
Messages that were deleted more than 55 days ago can be recovered from Google Vault, but only if:
- your organization uses Google Vault
- the Google Workspace admin has set up an admin’s Google Vault account
To recover deleted emails using Google Vault:
- Log in to your Google Vault account.
- Create a Matter, which is a folder where you can store your search queries.
- The Matter will open to the Search tab. Enter your search criteria here.
- Click Search.
- Vault will open a table of results. Find the emails you want to restore.
- Click Export Results to download the export files.
- Import the emails back into your (admin’s) Gmail account. Note that Google Vault doesn’t allow the direct Gmail message recovery to the user’s Gmail account.
In the last two sections, let’s take a look at strategies to:
- recover data from Google Drive
- recover Google Account history from Google Maps
How to Recover Data from Google Drive
Both users and admins can recover files deleted from Google Drive. However, users can only recover files that were deleted within the last 30 days and if they have not yet exceeded their Drive storage quota.
Also, the following data cannot be restored by anyone:
- Google My Maps files
- Fusion Tables
- Data in the Trash
How users can recover files from Google Drive
- Go to drive.google.com
- Check your Drive’s Trash folder. It appears in the left navigation.
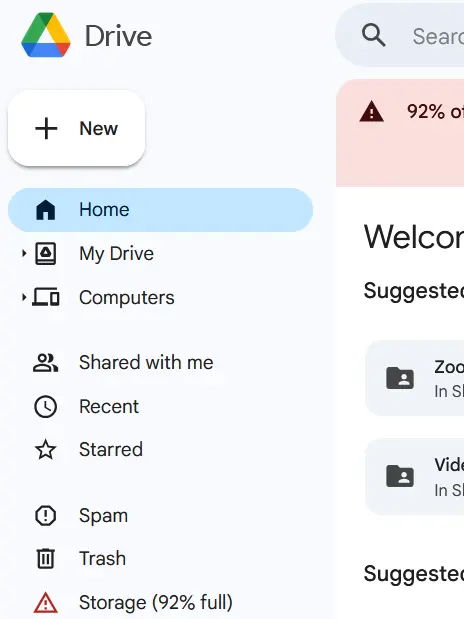
- Right-click on the files you want to restore and click Restore.
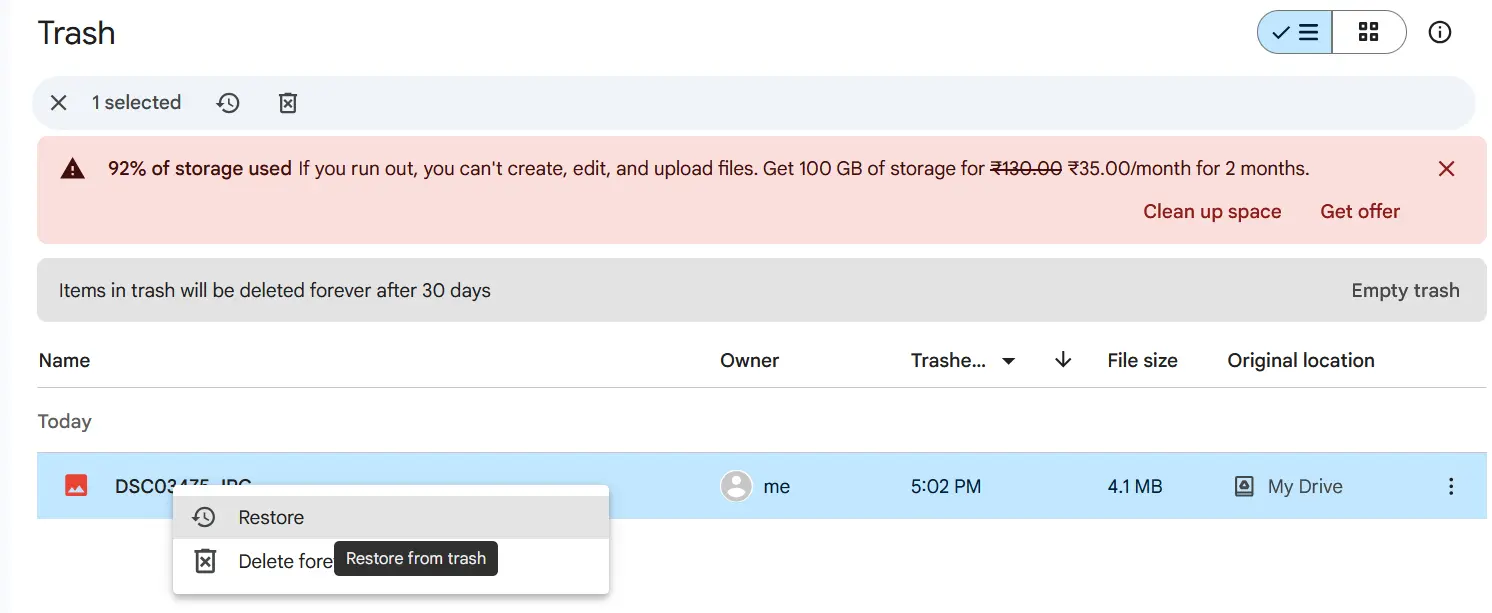
You can also use Google’s file recovery robot to restore files that were deleted within the last 25 days. Here’s how:
- Request file recovery. On clicking this link, you will be signed out of all other Google accounts because Google needs to verify your identify before the robot can execute your recovery request.
- Sign in to your Google account to confirm your request.
- Google will send you a confirmation email.
- The robot will search your account for deleted files and send you an update within one hour.
- If it finds files, it will put them back in your Drive and send you an update.
- Even if it doesn’t find any files, it will update you so know the status of your request.
How admins can recover users’ files from Google Drive
- Sign in to your Google Admin console using a valid admin account.
- Go to Menu
- Find the user whose Drive files are to be recovered and point to them.
- Click More options > Restore data.
- Select the date range for the data you want to restore, from within the last 25 days.
- Under Application, click the Down arrow > Drive.
- Click Restore.
- Ask the user to confirm if the restored files now appear in their Drive.
Admins can also restore data from Google Drive using Google Vault using the same procedure as for Gmail message recovery. Again, the restored files cannot be directly restored to the user’s Drive.
How to Recover Data from Google Account History
Google Account history is a log of all your activities using Google’s various services. To view it, follow these steps:
- Go to your Google Account.
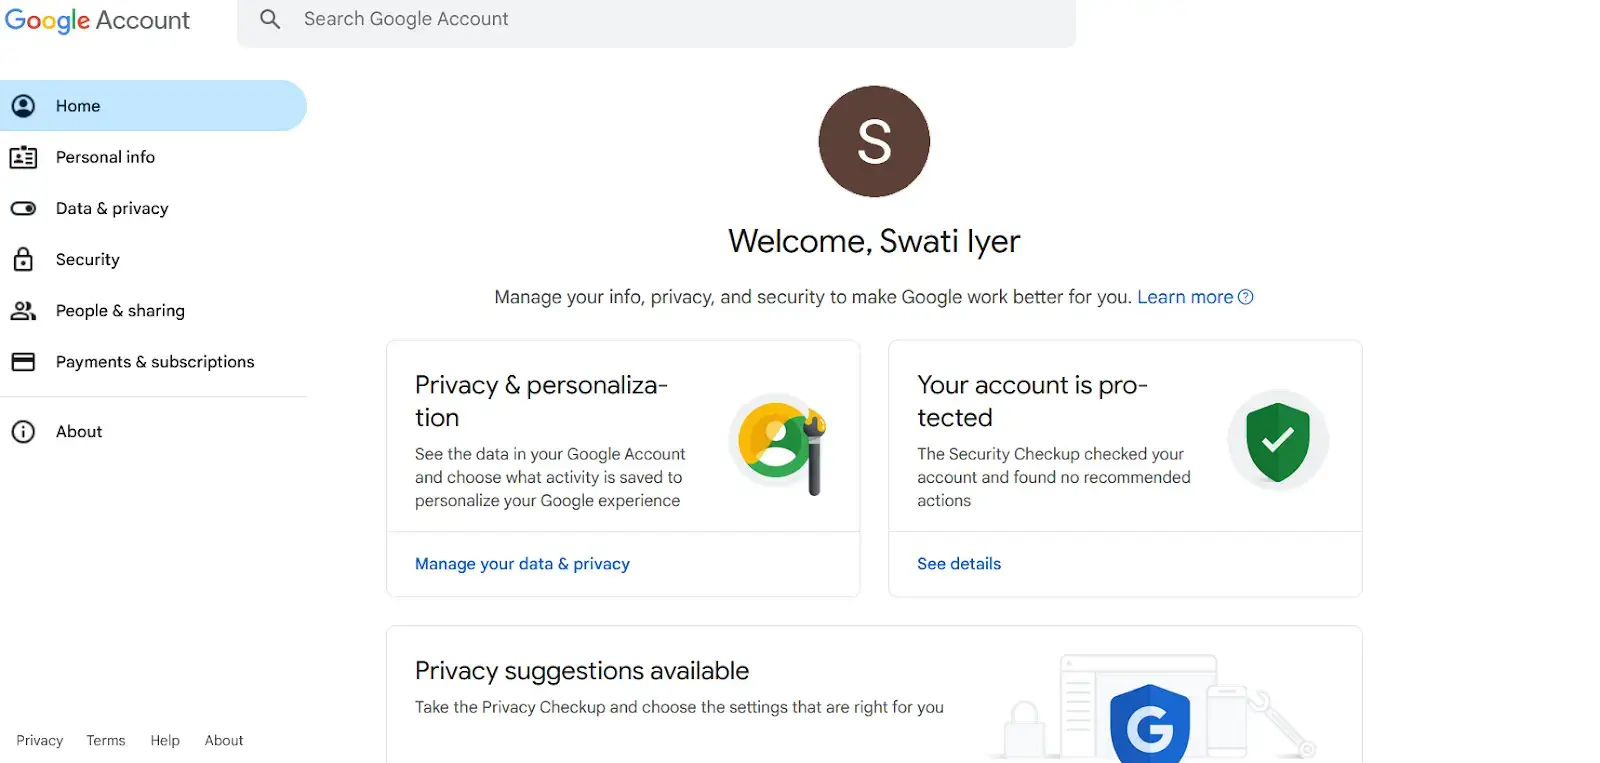
- Click on Data & privacy in the left navigation panel.
- Scroll down to “History settings” and click on My Activity.
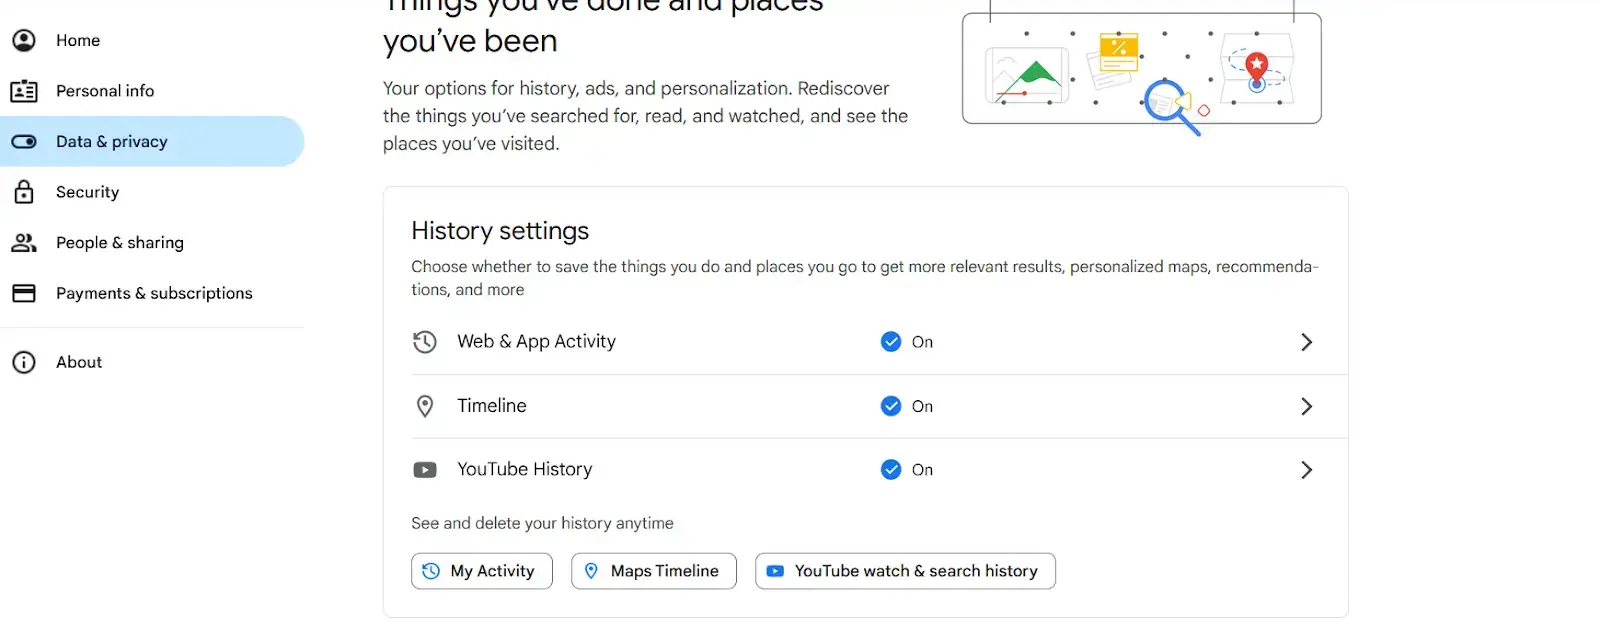
From here, you can:
- View your activity by day and time
- use the search bar and filters to find specific activities
- Filter activities by date and (Google) product
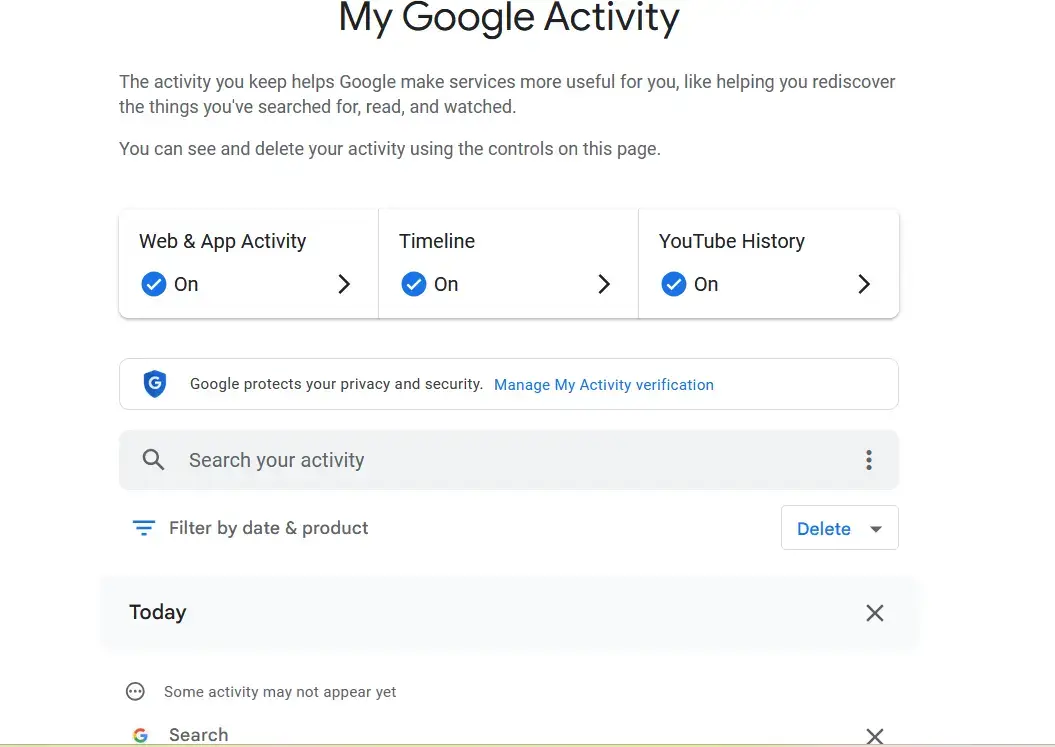
To view the Activity history on your Google Account, you should have turned on:
- Web & App activity
- Timeline
- YouTube history
How to Recover Location History from Google Maps
Timeline in Google Maps is a personal map that will help you to remember past places, routes, and trips based on your Location History. This feature is needed to view Location History but is no longer available on computers.
Follow these steps on your Android phone to recover your Location History:
- Open the Google Maps app.
- Tap your profile picture or initial in the top right.
- Click Your Timeline.
Check that Location Services and Location History are turned on:
- Under Your Timeline, tap More > Settings and privacy.
- Under ‘Location settings’, check whether ‘Location is on’.
- Under ‘Location settings’, check if ‘Location History is on’.
- Under Your Timeline, tap on the cloud icon that appears towards the top.
- From the “Your backups” section, select a device to save your location data.
- Tap More > Import.
- On the “Import Timeline from backup” screen, tap Import.
Follow a similar process to recover Location History on your iPhone or iPad.
Efficient, Reliable Google Account Recovery with SpinBackup
Keep the data in all your Google Accounts safe and secure with SpinBackup. This reliable Google Workspace backup and recovery solution gives you the freedom to recover a single email or restore an entire Gmail inbox. Choose from many storage locations and clouds to back up your data in a secure, compliant manner.
With this comprehensive data protection solution for Google Workspace, you get customizable backup retention, automated 3X daily incremental backups, flexible data restoration options, DLP, and local downloads. Take advantage of these capabilities to protect your entire Google Workspace from errors, malicious deletions, and cyber threats like malware and ransomware.
Click here to request a free demo of SpinBackup!
Was this helpful?
Latest blog posts
Cyberhaven: Latest Research Reveals 8 Additional Compromised Extens...
Spin.AI’s latest research has uncovered 8 additional compromised browser extensions, used by 1.1 million users...
Managed Service Provider Best Practices in Data Backup and Disaster...
Highlights the importance of a robust data backup and recovery program provided by Managed Service...
Exposing the Hidden Risks of Browser Extensions: Cyberhaven’s...
Today’s digital landscape is under attack like never before. Threat actors are looking for the...


